
Design Recap
The goal for this product is to act as a supporting tool in removing pests for dog owners in addition to accessories like a flea & tick collar or supplements. Sometimes the formulas in these repellants don’t guarantee keeping all pests away, and even with a short-haired dog, it can be hard to detect a bug as small as a poppy-seed crawling around your four-legged friend.
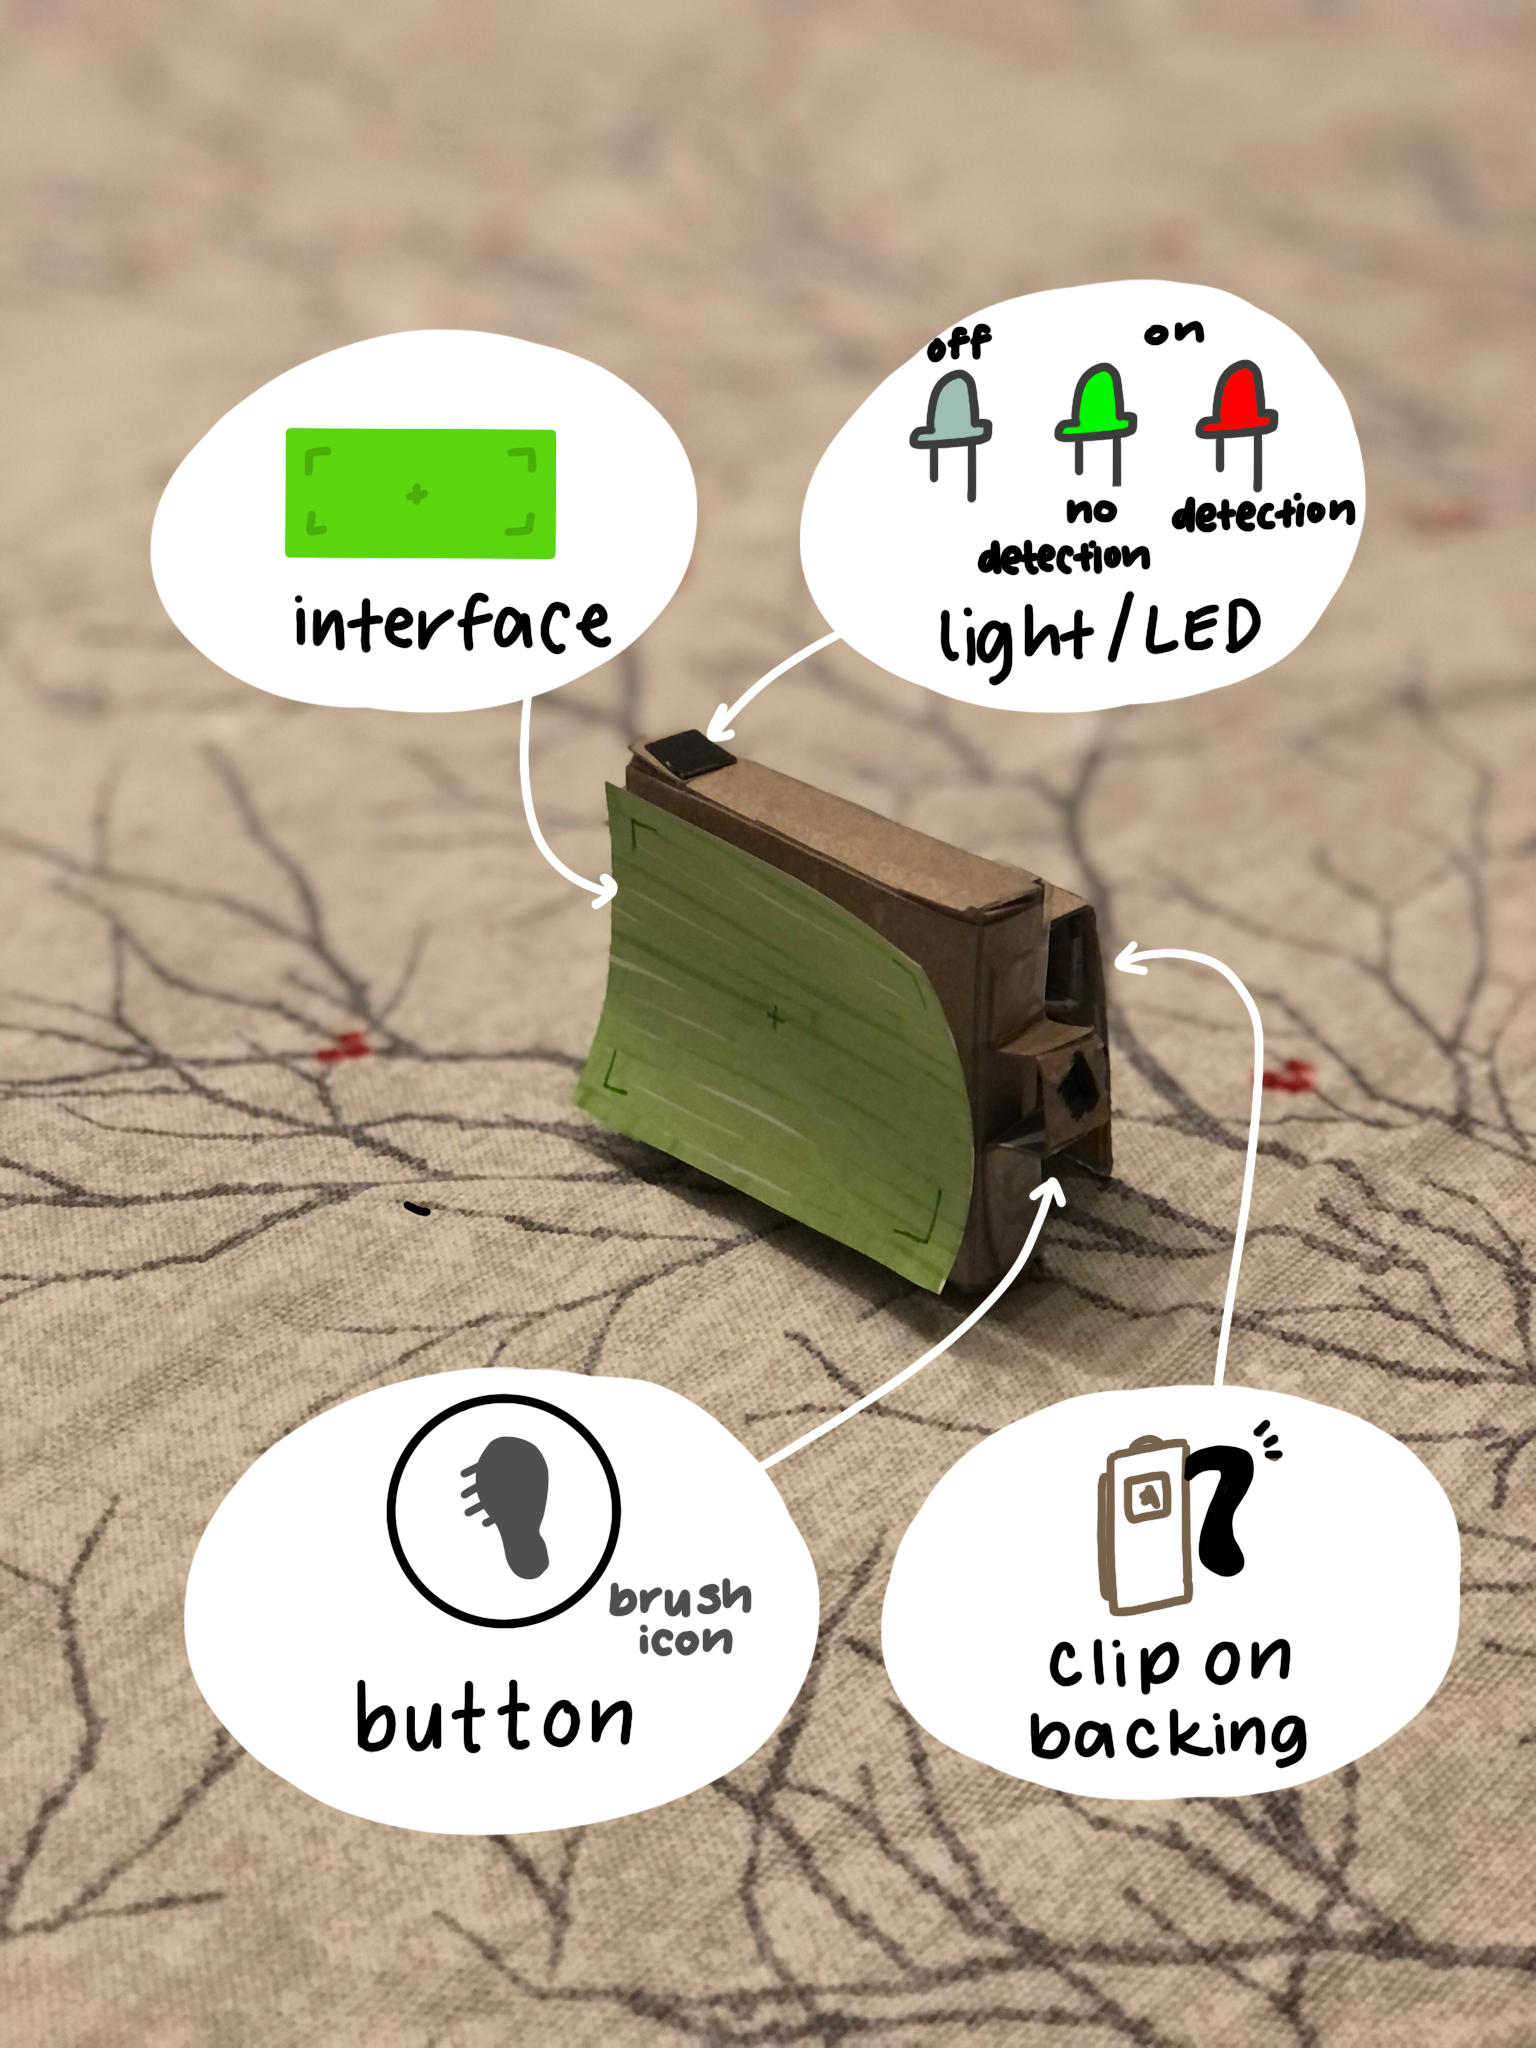
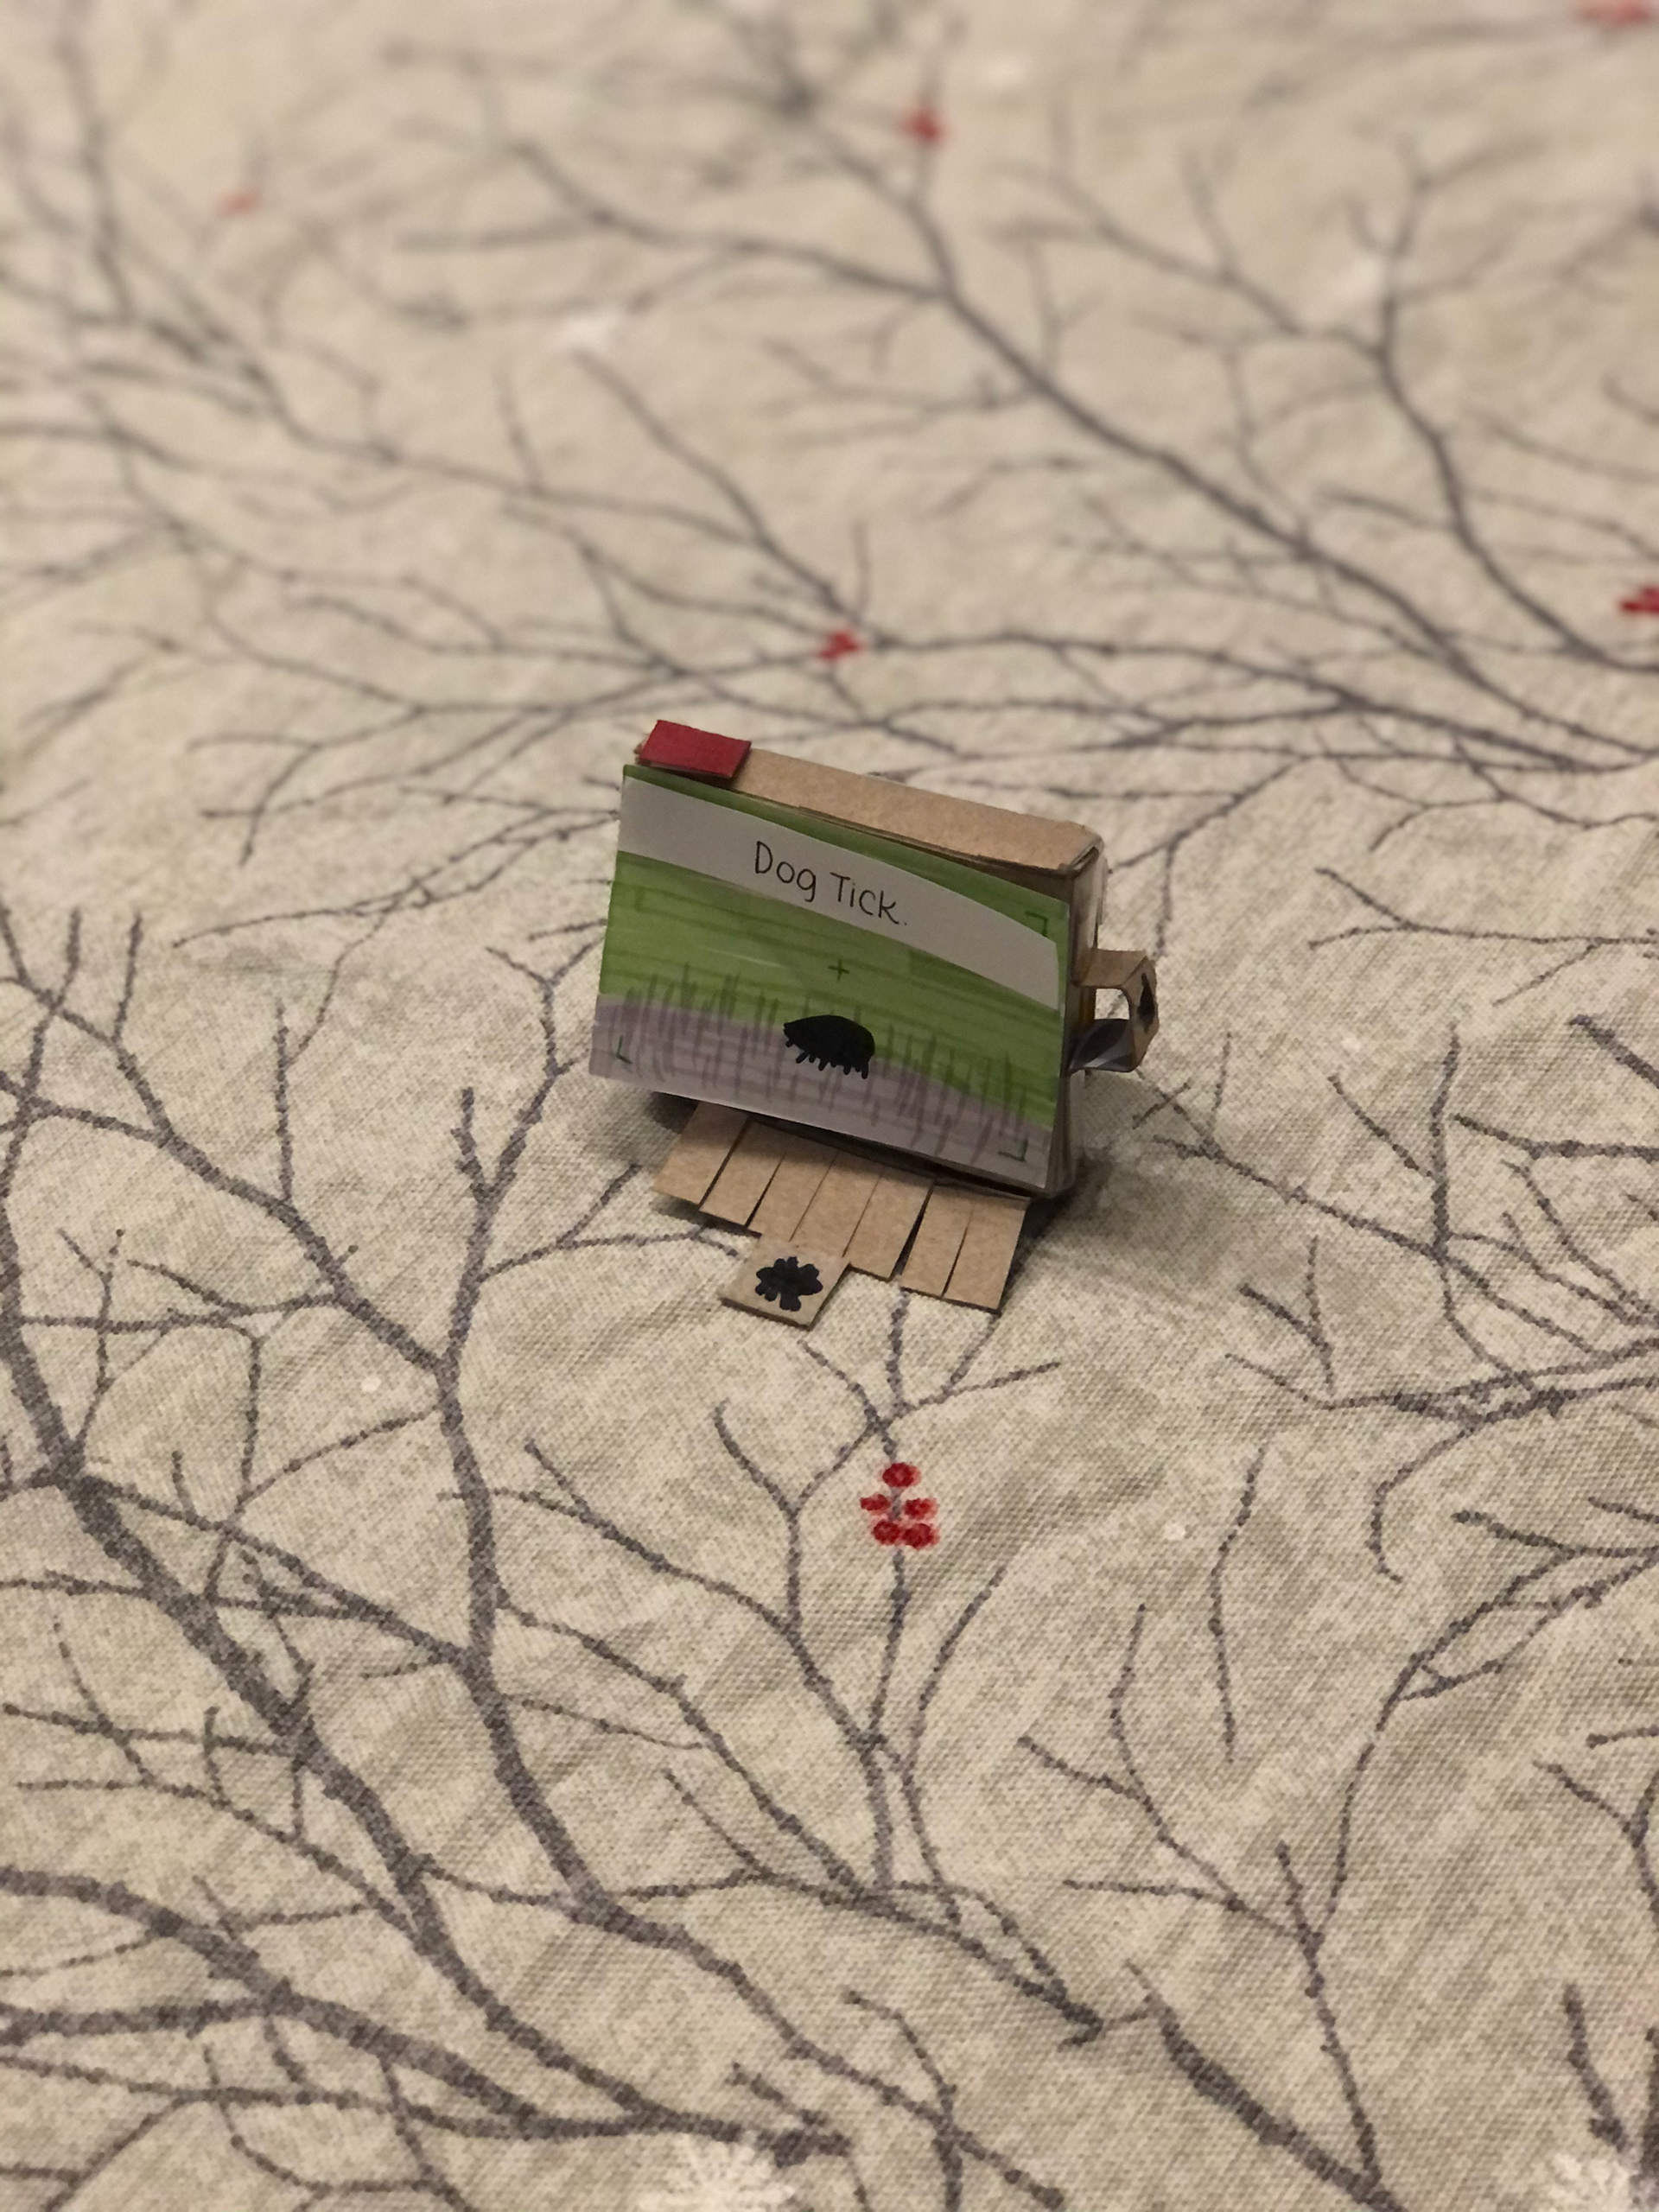
The Portable Pest Control prototype is a clip-on device for dog owners to help detect any suspicious bumps or bugs on their pet. Using a comb with camera-like ends, users can see a close-up scan of the surface of their pet’s skin and potentially any unwelcome pests. Additionally, the interface of the device can identify what specific pest was on the pet, and determine whether or not any bumps require further treatment. The comb can also catch any of these pests as it goes through the pet’s fur, making pest removal much easier as opposed to using your fingers.
The images below depict the physical prototype's basic features and scanner-like functionality.
What
A clip-on device that combs out any unwanted pests on dogs.
Who
Intended for dog owners or people with furry, four-legged pets.
Why
To make it easier to detect and remove pests.
Feasibility
Previously, I physically prototyped my Portable Pest Control device using cardboard, paper, markers, and other miscellaneous materials around my home. This week, I iterated on a higher-fidelity prototype using an online-CAD program called OnShape. OnShape, as with many other CAD programs, hosts a variety of complex tools to help carve out both simple and complex designs (i.e. extrusion, revolve, boolean).
Being able to build a 3D model is essential for testing the feasibility and aesthetics of physical products, and makes it machine ready for rapid iterations. Ideally, one would be able to 3D print or use CNC machines to see how the CAD model manifests in a physical space, and make appropriate changes based on the look and feel of the product.
Testing Feasibility
Unfortunately, due to the online setting of classes and working from home, I will not be testing my product in a Makerspace.
However, it is still just as important to emphasize that measuring the feasibility of the Portable Pest Control prototype means being able to a build 3D model in a CAD program.
Sketching
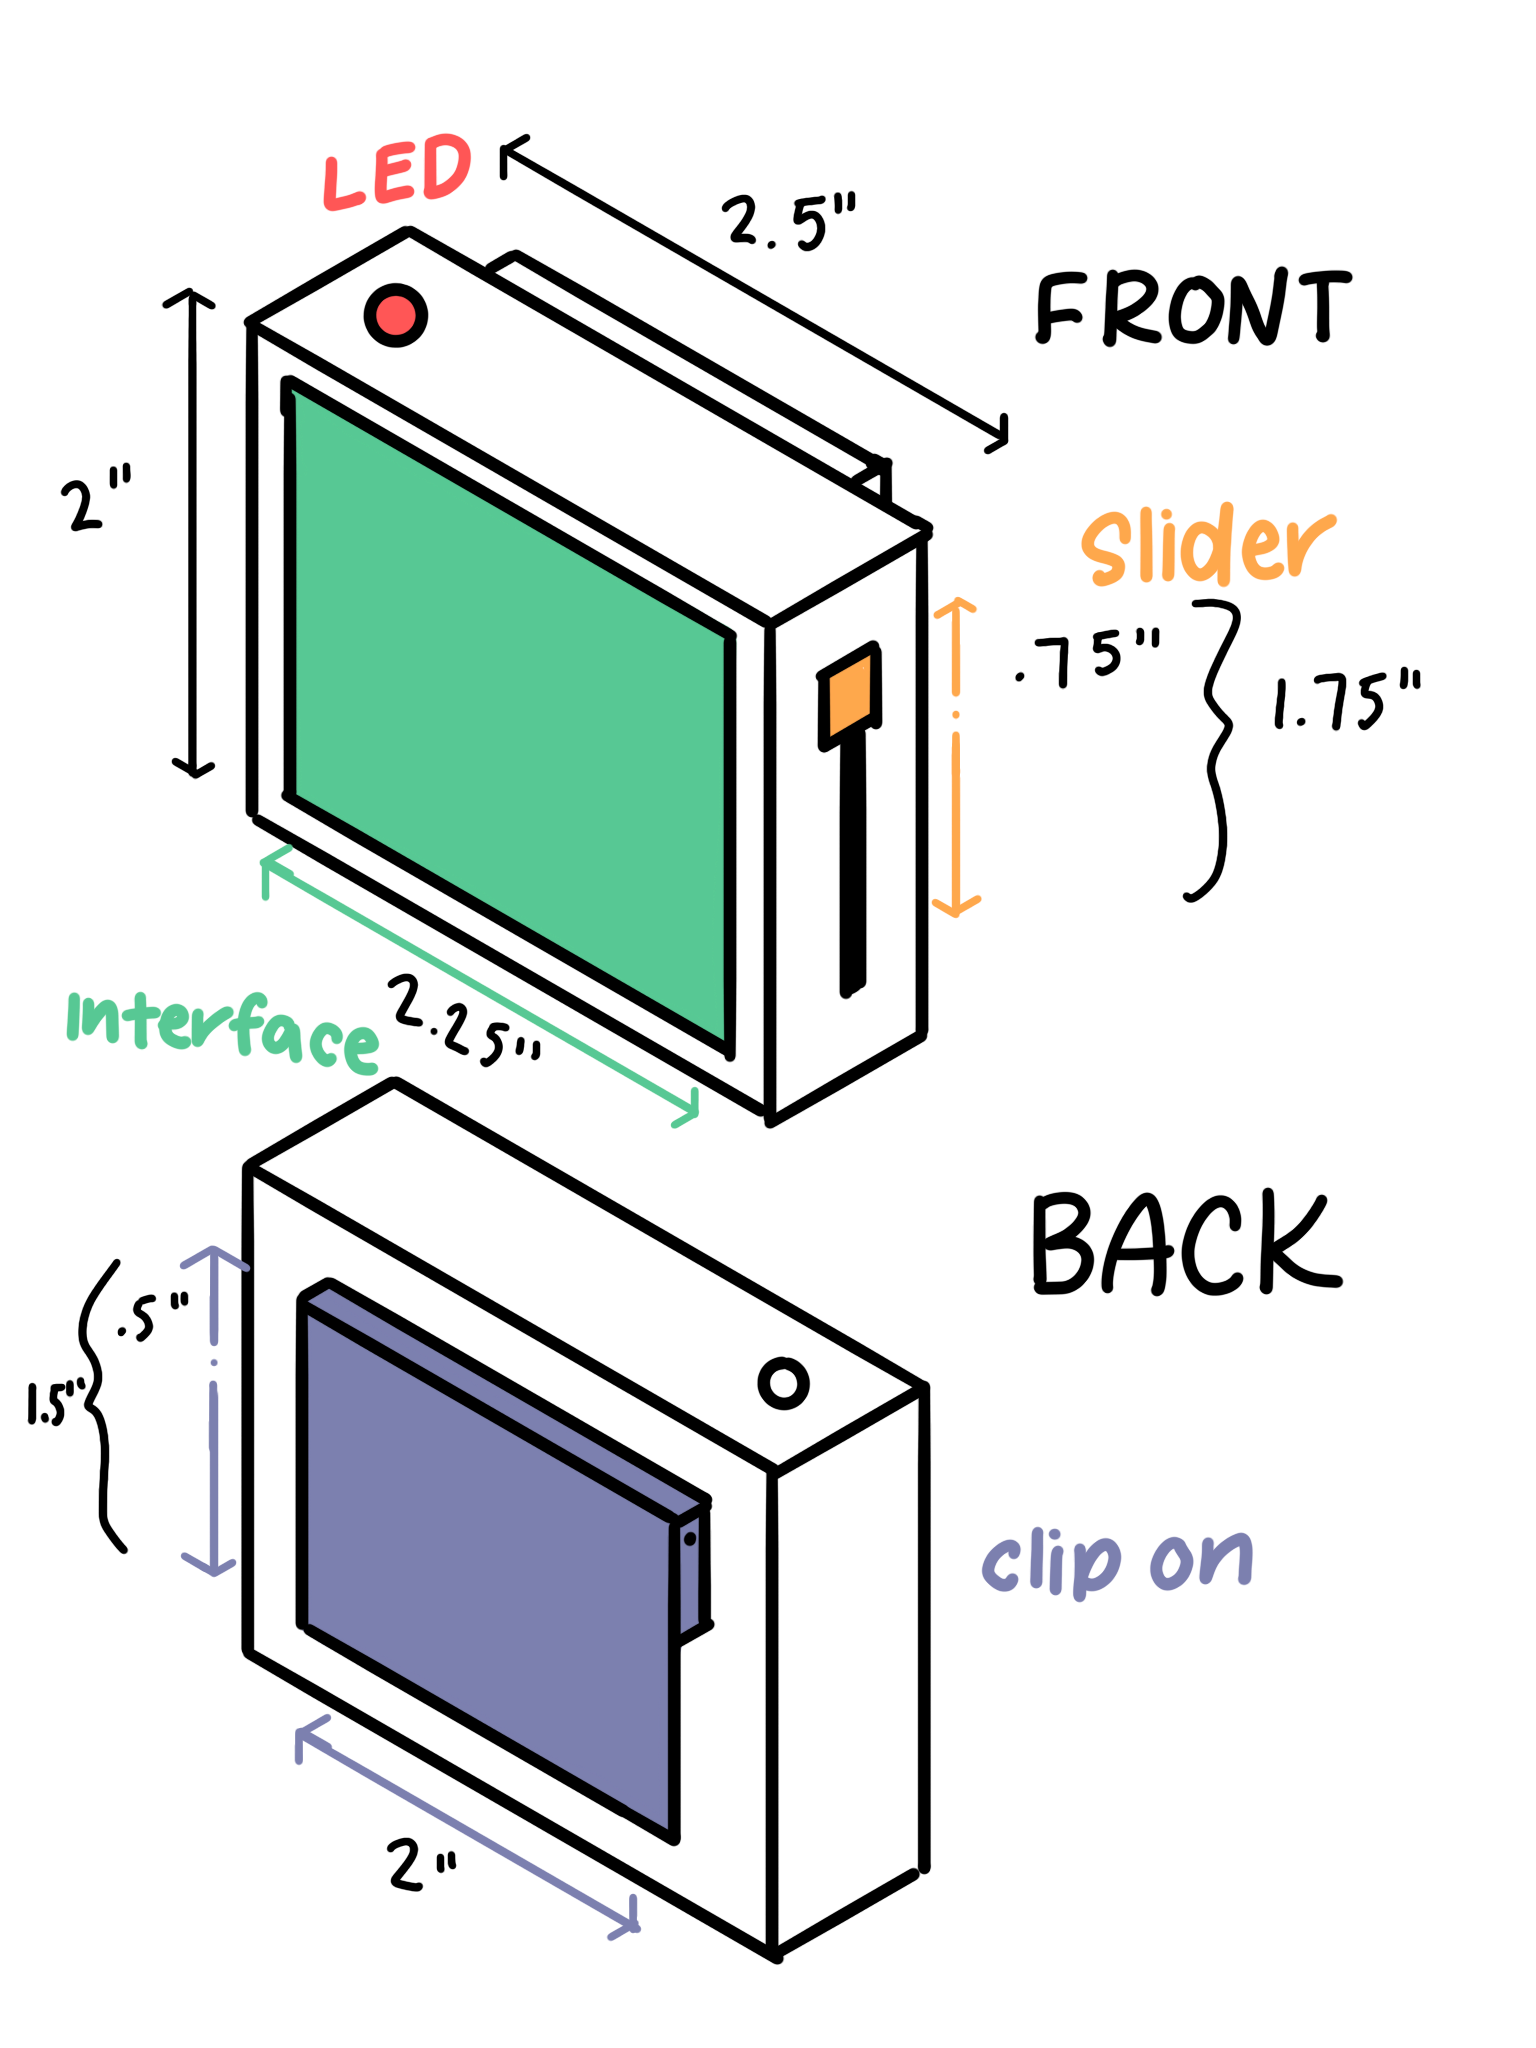
Building off of my previous sketches, I drafted a more cleaner, technical sketch that would help with illustrating key features in my prototype. As shown below, I brought more attention to the dimensions of the LED, button, interface, clip on, and brush feature.
Previous Iterations
Unlike my other rough drafts, I wanted these to be cleaner and more accurate so I could readily translate them into OnShape.
Prototype
Diving straight into OnShape, my first iteration of the prototype involved sketching simple shapes (rectangles and circles) and extruding them to create the depth of the device. I added a fillet to the back of the device to soften its edges.
Main Operations
For my 3D model, I mainly used the extrusion tool, subtraction, and fillet.
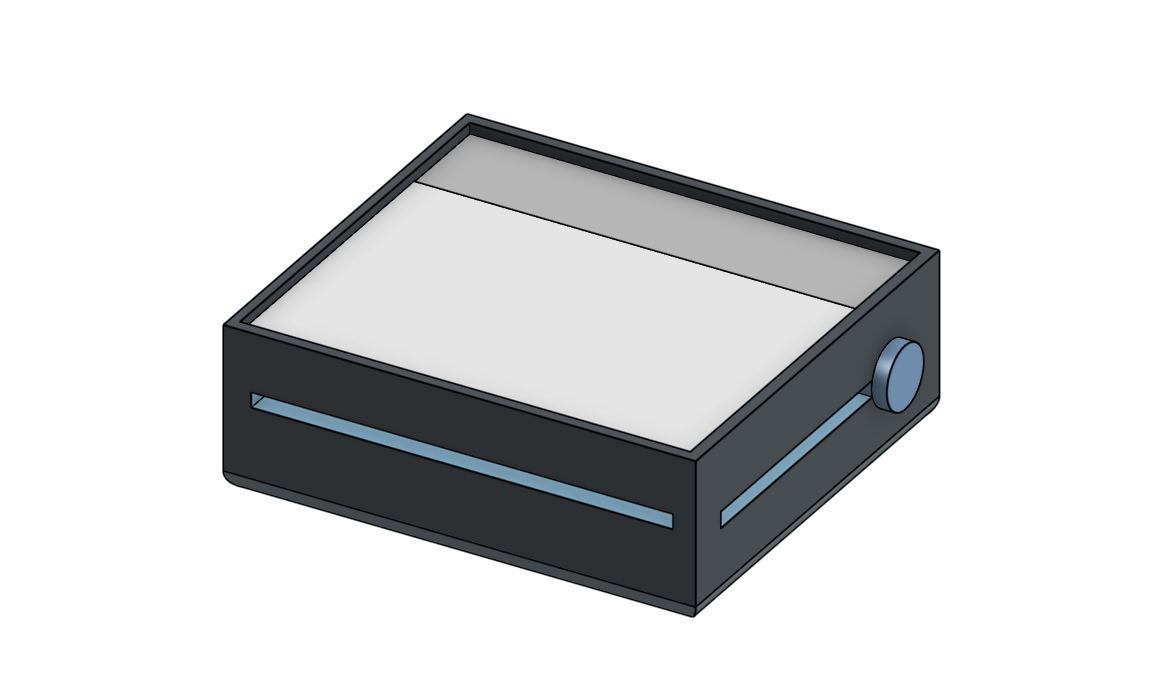
Current Model
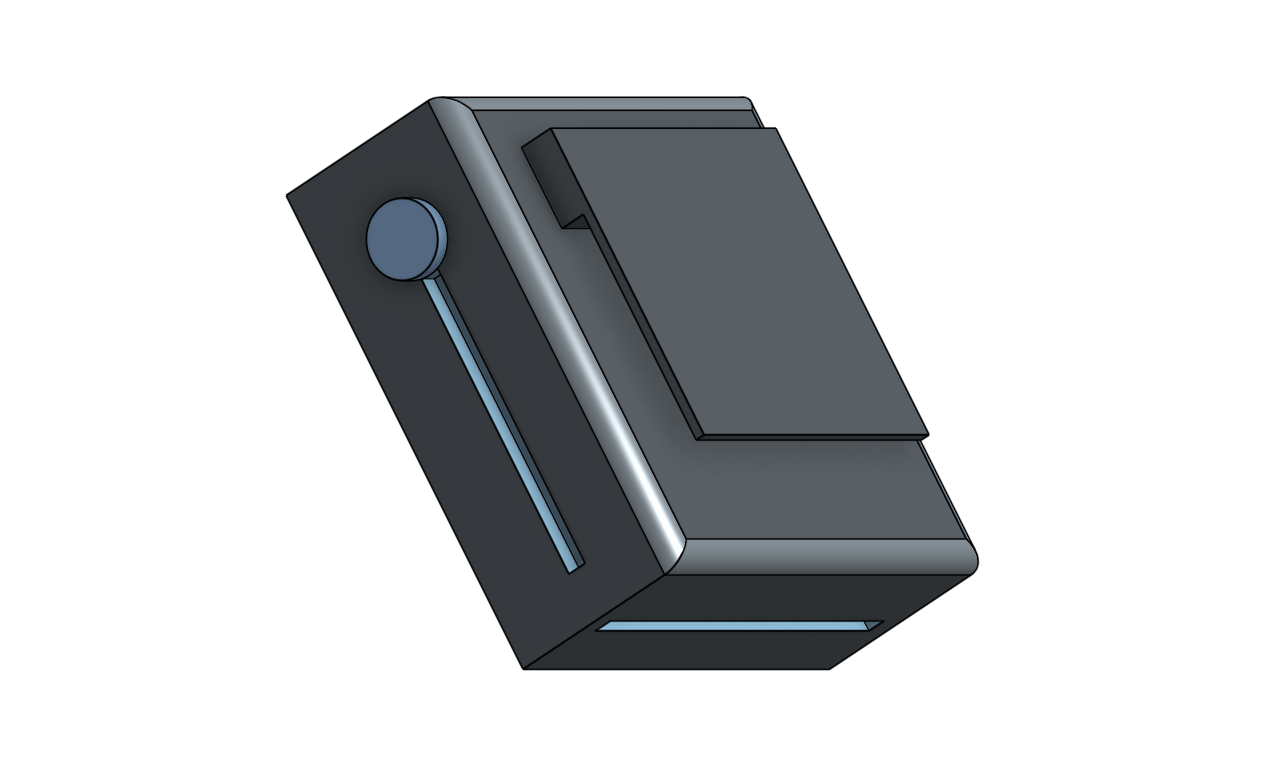
On the left, you can see an isometric view of the Portable Pest Control in OnShape.
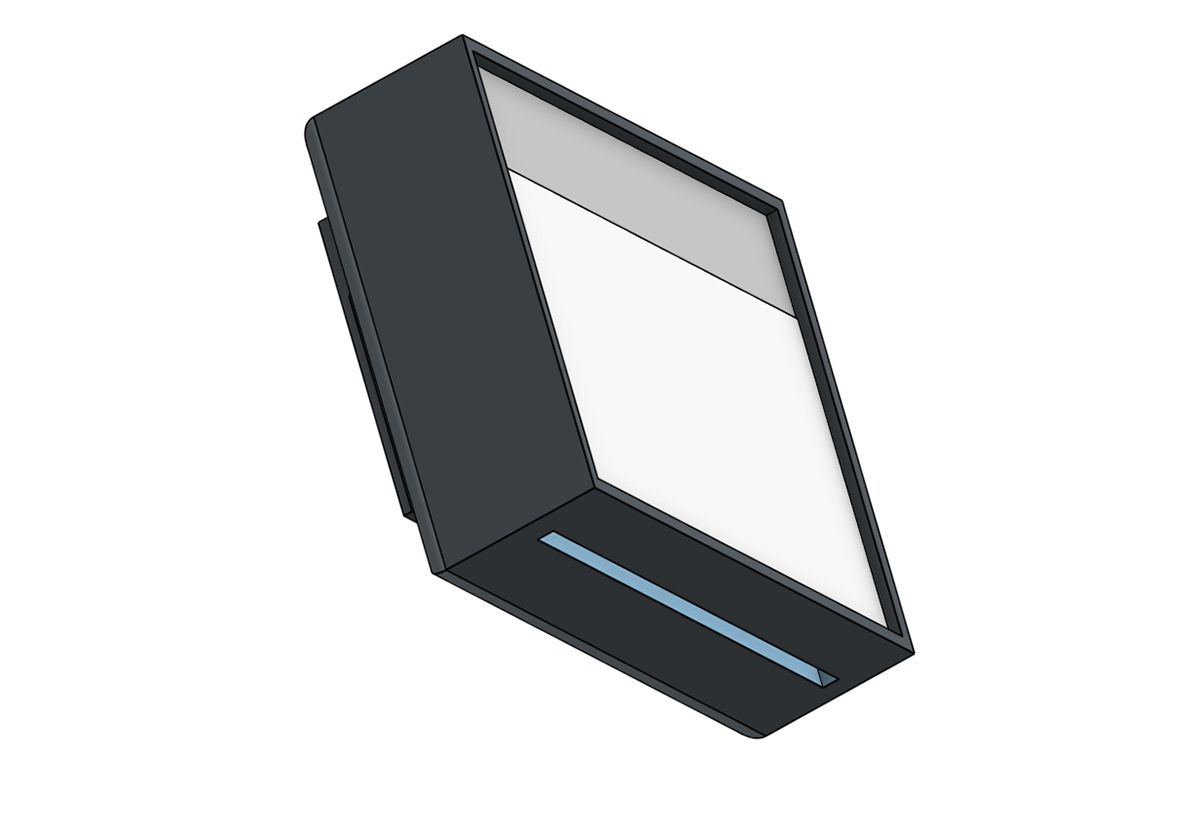
I created more depth using extrusion and subtraction to carve out the interface of the prototype. I added colors as well to create more contrast between each of the parts of the prototype.
The interface for the prototype is split into two pieces: the lighter gray portion indicates where the image of the scanner would be displayed, while the darker gray portion would display the text of the device.
Additional Notes
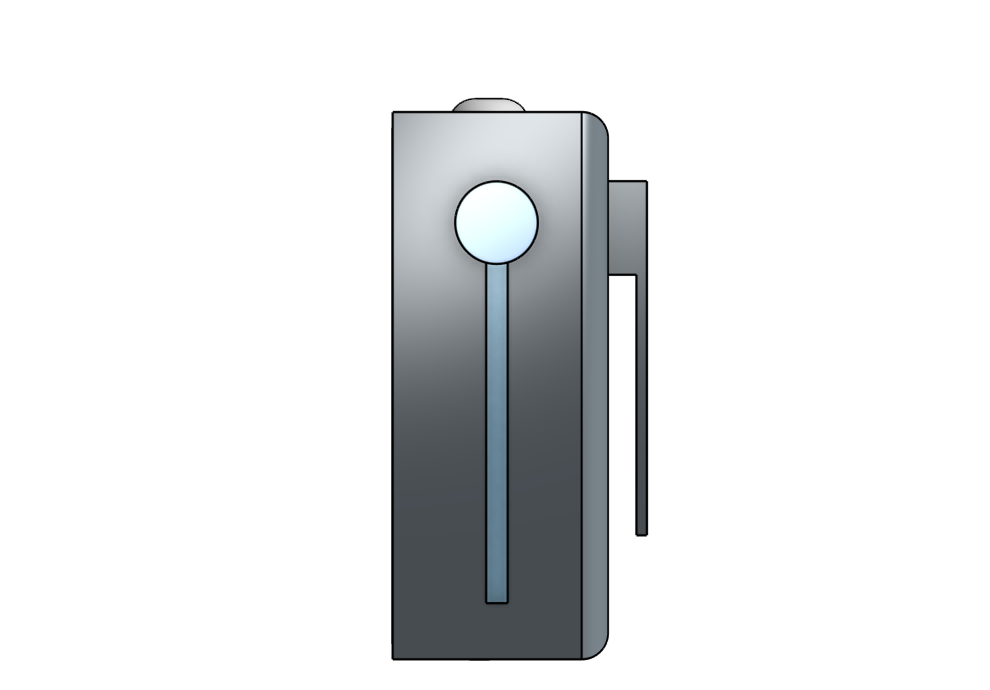
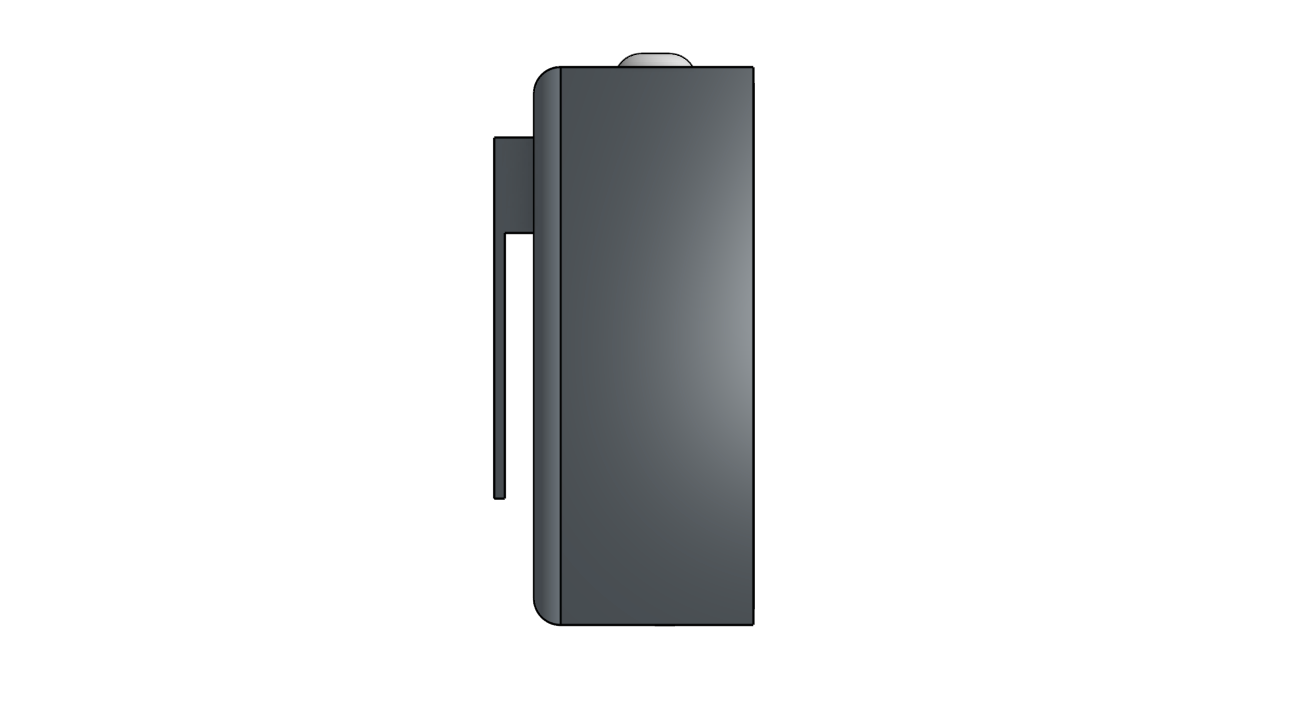
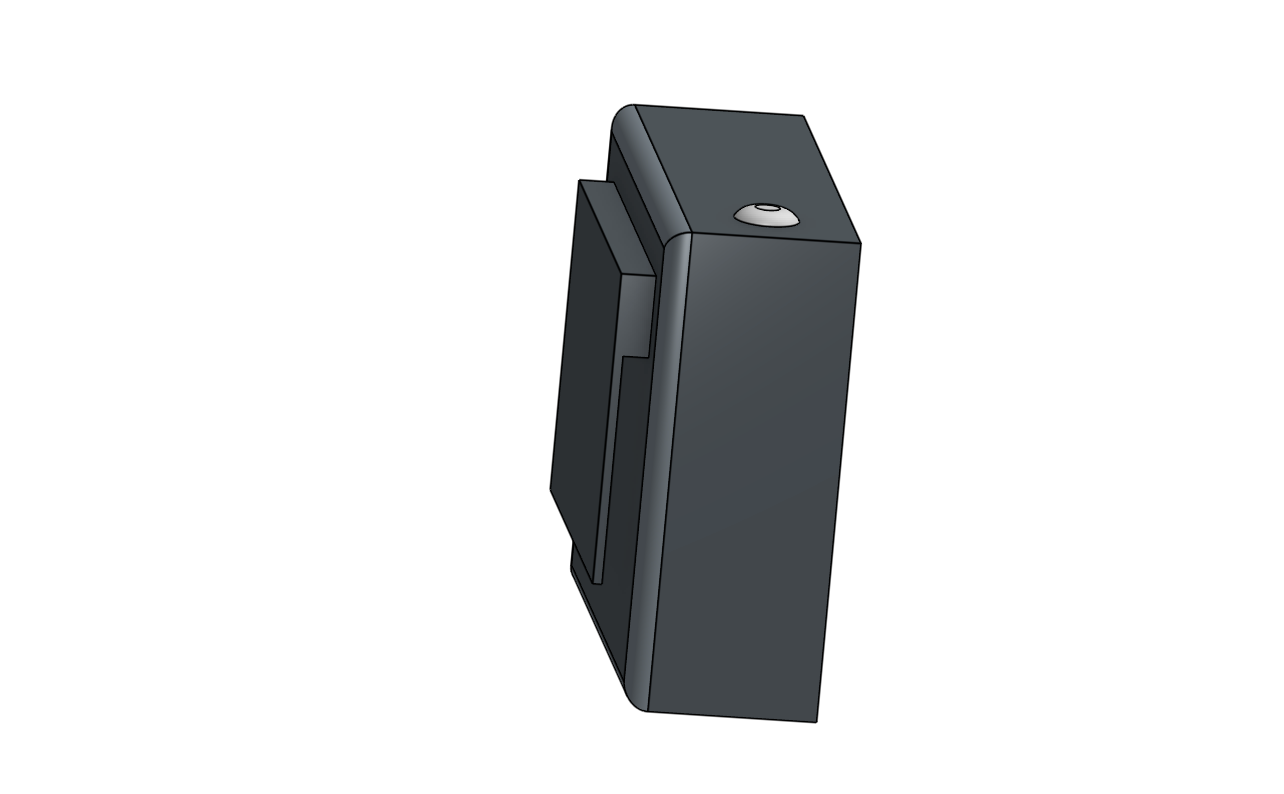
At the top of the model, I sketched and extruded a circle with a fillet to mimic the appearance of an LED. The side views show that there is only one button/slider on the prototype.
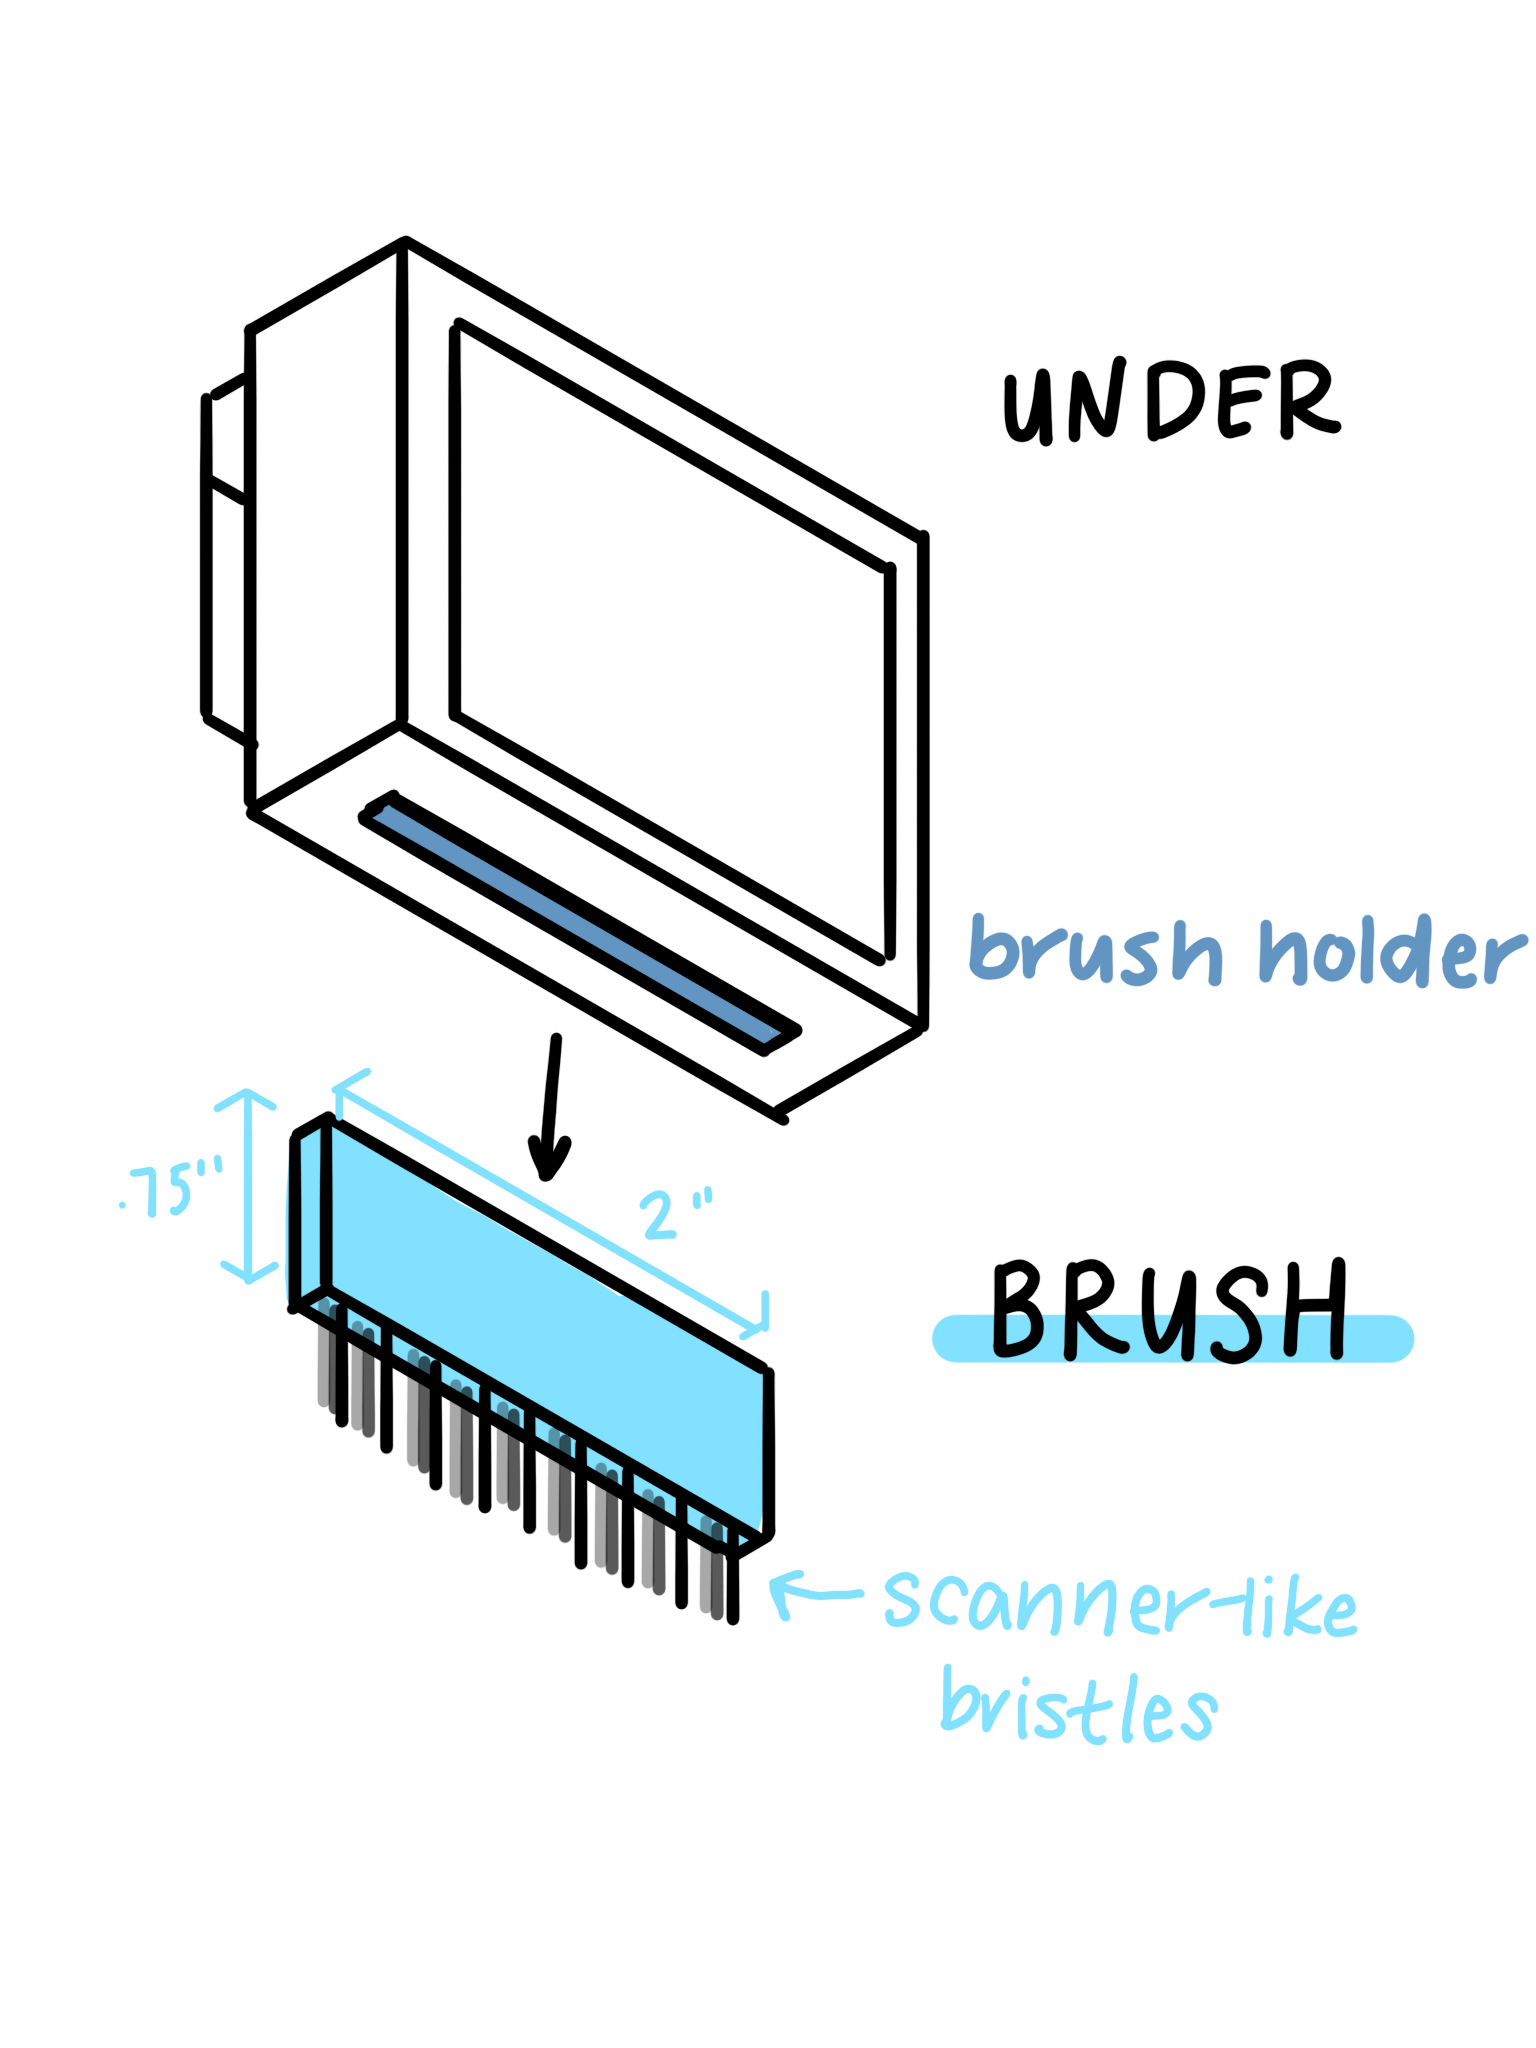
On the back of the prototype, I created the clip-on portion of the device similar to that of my analog one. It consists of rectangle extrusions. I also cut out a rectangular shape at the bottom of the prototype to indicate where the brush goes.
Analysis
I’m currently in an animation class and we are using a modeling tool, and while there are some parallels between the technical language and tools (i.e. extruding, mesh, etc.), the applications work for different intentions. Unlike my physical prototype that used to have a button, the CAD model uses a slider based on previous feedback.
Reflection & Takeaways
I learned through this assignment that CAD modeling is incredibly difficult, yet I gained a newfound appreciation for industrial design. Something I realized during my first peer review session was that I completely did my modeling process backwards; I jumped straight into OnShape instead of sketching out the technicalities and sizing for my project, which made it more difficult to change later on. Looking back, I would consider refining my technical sketches and then begin implementing it on OnShape.
I did a critique session with my peers on my first iteration for my CAD model and learned the following insights:
• Adding color helps with making each part easier to distinguish
• Using features like boolean is really difficult, but there are workarounds to create shapes with the same effect
• It's important to make features proportional and more to-scale during the beginning of the CAD process
• It's difficult to make/add finer details in the CAD modeling system
I chose not to work on the brush feature because I wasn't quite sure how the assembly feature worked, and thought that creating hair-like bristles was not that feasible. If I had more time for this project, I would consider revisiting this prototype and look into other ways to 3D model the brush tool as well.